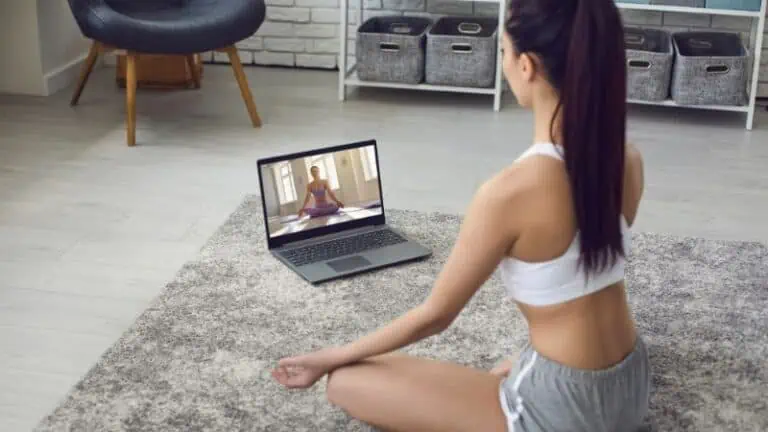
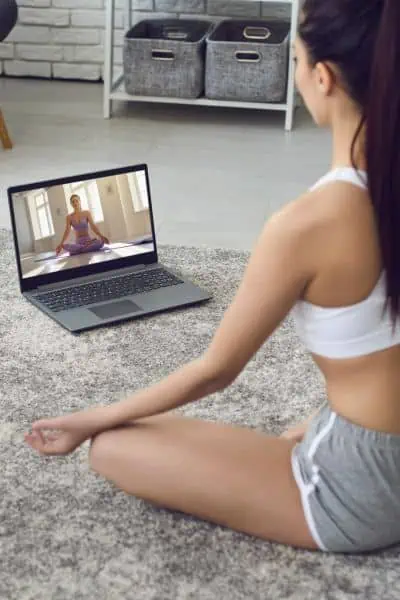
Training videos help learners acquire knowledge and master skills. I use training videos in online sessions and in-person workshops.
I have a two-fold mission. I will create my videos so I can readily distribute them to clients, and I will teach trainers what I am learning along the way.
I learn through observation, interviews, research, and experience. So, if you want to journey with me in creating training videos that will make learning simple, easy, and quick… you are in the right place.
Understanding the Basics
Let’s understand the basics first before we talk about creating our training videos.
Let me share why training videos are important and how they can enhance learning and retention.
The Importance of Training Videos
Videos are now a leading medium for communication. People get their facts from Youtube and Tiktok.
Training videos, in particular, are incredibly useful for several reasons:
Versatility: Training videos can be used for a wide variety of topics and purposes, from onboarding new employees to teaching specific skills or educating about new products or services.
Accessibility: Videos can be accessed and viewed anytime, anywhere, providing learners with the flexibility to learn at their own pace.
Consistency: Videos ensure that the same information is delivered consistently to all viewers, reducing the risk of miscommunication or misunderstanding.
Efficiency: Videos can deliver a large amount of information quickly and succinctly, making them a time-effective tool for learning.
Videos Enhance Learning and Retention
Training videos are not just convenient; they also enhance learning and retention by leveraging the power of visual communication.
Here’s how:
Visual and Auditory Learning: Videos cater to both visual and auditory learners, making the content more accessible and easy to understand. The combination of visuals and audio can improve comprehension and information retention.
Engagement: Dynamic visuals, animations, and other video elements can help engage viewers and hold their attention, which is essential for learning.
Demonstration: Videos can demonstrate procedures, processes, or behaviors more effectively than text or images alone. This visual demonstration can help learners understand complex topics or procedures.
Repetition: Videos can be paused, rewound, and rewatched, allowing learners to repeat sections they find challenging. This repetition can significantly improve knowledge retention.
I am an introvert. For this reason, I prefer to express myself in the text since I don’t have to show my face.
In creating videos, you don’t really need to show your face.
But, I don’t want to deny my audience the opportunity to learn from me. Text cannot translate my facial expressions, gestures, and voice.
So, let’s continue.
Develop Your Training Video Concept
Let’s delve into the process of developing your training video concept.
A well-planned concept sets the foundation for an effective video. Here’s how to get started:
Identify Your Audience
Before you start, you need to know who you’re creating the video for.
Understanding your audience is crucial in tailoring your video’s content, style, and language.
Steps:
- Define your target audience: Are they new employees? Customers learning to use a product? Participants in a professional development course?
2. Understand their needs and preferences: What is their level of familiarity with the subject? What format and pace do they prefer? What are their goals?
3. Adapt your content: Use the information about your audience to guide your content creation. This might involve simplifying complex topics or choosing a more formal or casual tone based on your audience.
Set Clear Learning Objectives
Every effective training video has clear learning objectives. These provide a roadmap for your video content and help keep your audience focused and motivated.
Steps:
1. Identify what you want your audience to learn: This might be a new skill, knowledge about a topic, or a change in attitude or behavior.
2. Write clear and measurable learning objectives: Use action verbs and specify the outcome you expect. For example, “After watching this video, the learner will be able to assemble the product correctly.”
3. Share your objectives: Make sure your audience knows the learning objectives at the beginning of your video.
Structure Your Content
Structure your content in a logical, easy-to-follow manner.
This helps learners understand and remember the information better.
Steps:
- Break down your content: Start by breaking your content down into manageable sections or modules. Each should cover a specific part of your overall topic.
- Organize your content: Arrange your sections in a logical order. This might be a chronological process, a series of steps, or a concept broken down from general to specific.
- Create a storyboard: A storyboard is a visual representation of how your video will unfold. It helps you plan your scenes, script, and visuals.
By identifying your audience, setting clear learning objectives, and structuring your content, you’ll be well on your way to developing a robust concept for your training video.
The next section will explore how to create your video on a budget.
Create Training Videos on a Budget
You can create high-impact videos. and it doesn’t have to be expensive.
It can be done with minimal or no budget at all using simple tools and resources you might already have.
I will provide you with practical tips on creating cost-effective training videos.
Free and Low-Cost Tools for Video Creation
Having the right tools can make your video creation process smoother and more efficient.
Fortunately, there are several free and low-cost tools available that can help you create high-quality videos:
Camera: You don’t need a high-end camera to film a good training video. Your smartphone likely has a high-quality camera built-in, which is more than sufficient for most purposes.
You may want 4K quality videos, and most cameras can produce that. However, if you are to upload these videos online, you may not need the 4K quality.
Screen recording and video editing tools: There are numerous free and affordable tools for screen recording and video editing.
For example, Loom is a great tool for screen recording and basic editing, and it offers a free version. You can also use the free version of Zoom, Google Meet, and Streamyard.
Graphics and animation tools: Free tools like Canva and Powtoon can be used to create graphics and animations for your video. Canva Premium isn’t that expensive too.
Audio tools: Tools like Audacity can help you record and edit audio for your video, and it’s completely free to use. Garage Band is already free if you have a Mac.
DIY Filming Techniques
Even with a limited budget, you can film high-quality footage using some simple do-it-yourself techniques:
- Setting up your space: Choose a quiet, well-lit area to film. Natural light is ideal, but if it’s not available, use lamps to illuminate the area evenly.
- Stabilizing your camera: Use a tripod or a flat surface to stabilize your smartphone or camera. This will help your video look more professional.
- Sound quality: Use a separate microphone if possible to improve sound quality. If that’s not an option, make sure to test your device’s microphone to ensure the sound is clear. I use Rode II. But a microphone worth 500 pesos may already work magic.
- Framing: Make sure the subject of your video is in focus and appropriately framed. If you’re filming a person, make sure their eyes are around one-third of the way down from the top of the frame.
Utilize Free Stock Video Resources
If filming isn’t an option, you can use free stock video resources. I haven’t used these, but I see a lot of marketers use free stock video resources. It is used in presentations. There are also cheaper resources you can buy for “unlimited” use.
These platforms offer a variety of video clips that can be used in your training videos:
- Search for relevant clips: Sites like Pexels and Pixabay offer high-quality stock videos for free. Simply search for clips relevant to your topic.
- Download and edit: Once you’ve found the right clips, download them and edit them into your video using your chosen video editing tool.
- Attribute correctly: While most of these clips are free to use, make sure to check the licensing and attribute the creator if required.
By utilizing these strategies and resources, you can create engaging and effective training videos without breaking the bank.
Up next, we’ll talk about how to optimize the production process to save you time.
Optimizing the Production Process for Speed
Creating a training video doesn’t need to be time-consuming. With careful planning and organization, you can streamline the production process to save time and increase efficiency.
I will guide you on how to speed up the pre-production, production, and post-production stages of your video creation.
Planning for an Efficient Shoot
The pre-production stage includes all the preparation before you start filming.
It’s essential to be thorough in this phase to prevent delays later.
Steps:
- Plan your script: Having a clear, well-structured script is crucial for an efficient production process. Make sure your script aligns with your learning objectives and storyboard.
- Prepare your shooting location: Set up your filming location ahead of time. Check the lighting, eliminate background noise, and ensure all your equipment is working properly.
- Schedule your shoot: Plan your filming schedule to make the most of your time. If you’re filming multiple videos or scenes, try to group similar ones together to reduce setup time.
Time-Saving Techniques During Filming
The production phase involves the actual filming of your video. Here’s how you can save time during this stage:
Steps:
- Follow your script and storyboard: Your script and storyboard are your guides during filming. Stick to them to ensure you cover all necessary points efficiently.
- Limit the number of takes: While it’s important to capture good footage, try not to redo takes unnecessarily. Too many takes can be time-consuming and may not significantly improve the final product.
- Shoot in sequences: If possible, shoot your video in sequences that match your storyboard. This will save you time during editing.
Streamlining Editing and Revision
The post-production phase involves editing your video and making revisions. Here’s how to optimize this process for speed:
Steps:
- Organize your footage: Before you start editing, organize your footage according to your storyboard. This makes it easier to find the clips you need and reduces the time spent searching through your files.
- Use an efficient editing tool: Use an editing tool that suits your skill level and needs. Some tools offer automatic features that can save you a lot of time, such as automatic color correction or audio syncing.
- Limit revisions: While it’s important to produce a quality video, try not to get caught up in endless minor revisions. Set a limit for revisions to avoid spending too much time perfecting small details.
By optimizing each stage of your video production process, you can create high-quality training videos in less time.
In the next section, will discuss how to make your training videos impactful and engaging for your audience.


If your team is stuck in meetings, misalignment, or slow decisions…
Let’s design one shift they can use immediately.
→ Shift Experiences